How to make your own DIY optical waist-level viewfinder for any camera
Jan 27, 2025
John Aldred
John Aldred is a photographer with over 25 years of experience in the portrait and commercial worlds. He is based in Scotland and has been an early adopter – and occasional beta tester – of almost every digital imaging technology in that time. As well as his creative visual work, John uses 3D printing, electronics and programming to create his own photography and filmmaking tools and consults for a number of brands across the industry.
Share:
Waist-level viewfinders aren’t all that common in photography today. In fact, most people coming into photography in the last decade may not even know what one is. They used to be the norm for many medium-format, and some 35mm cameras.
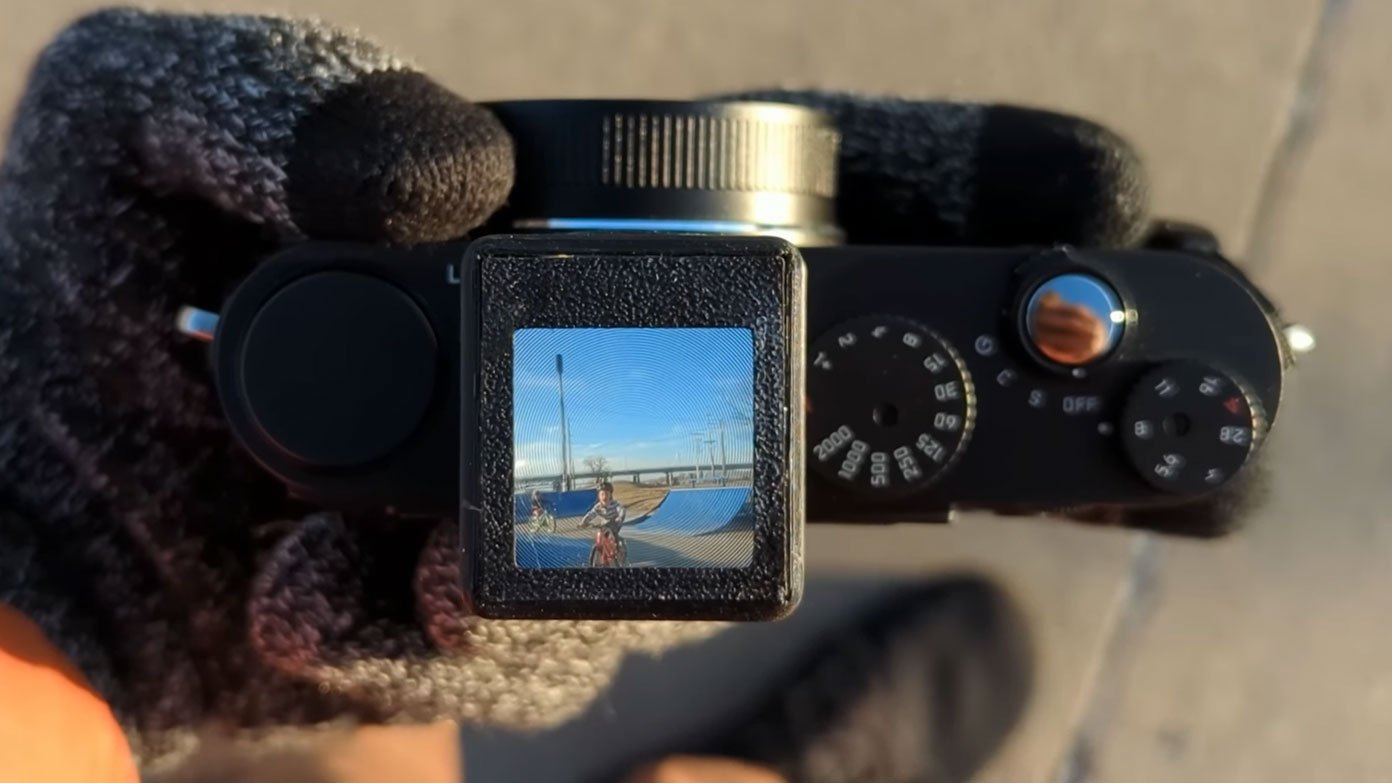
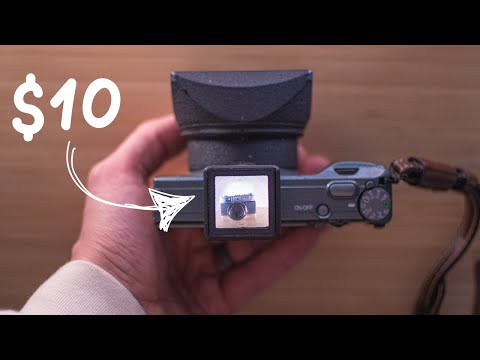
You can add one to your modern mirrorless camera, though. All it takes is a lens, a mirror and a little DIY. In this video from Snappiness, we see the complete build from start to finish.
What is a waist-level viewfinder, and why do I need one?
A waist-level viewfinder, as the name suggests, is a viewfinder that lets you see what your camera sees when holding it at waist level. You look down at your camera from above, allowing you to see the scene before you. They were often found on Twin Reflex Cameras, like the Mamiya C330 Pro F.
This is great for things like street photography, where you don’t necessarily want people around you to now that you’re shooting a photograph. It also allows you to get some unusual shots that wouldn’t easily be achievable with a regular eye-level finder.
Waist-level finders can also help to prevent camera shake, as it allows you to make your body more rigid than when holding a camera up to your eye. The viewfinders found on such camera are also generally much larger than a regular viewfinder.
They do have their disadvantages, though. They’re generally slower to compose your scene because the image is mirrored horizontally. They can also be challenging in brighter conditions where the view may be blown out by the light around you.
It’s not a perfect tool for all shooting conditions, but it does have its perks in many situations you might find yourself in. And in the case of this one, you can always just take it off when you don’t need it.
So, how do I make one?
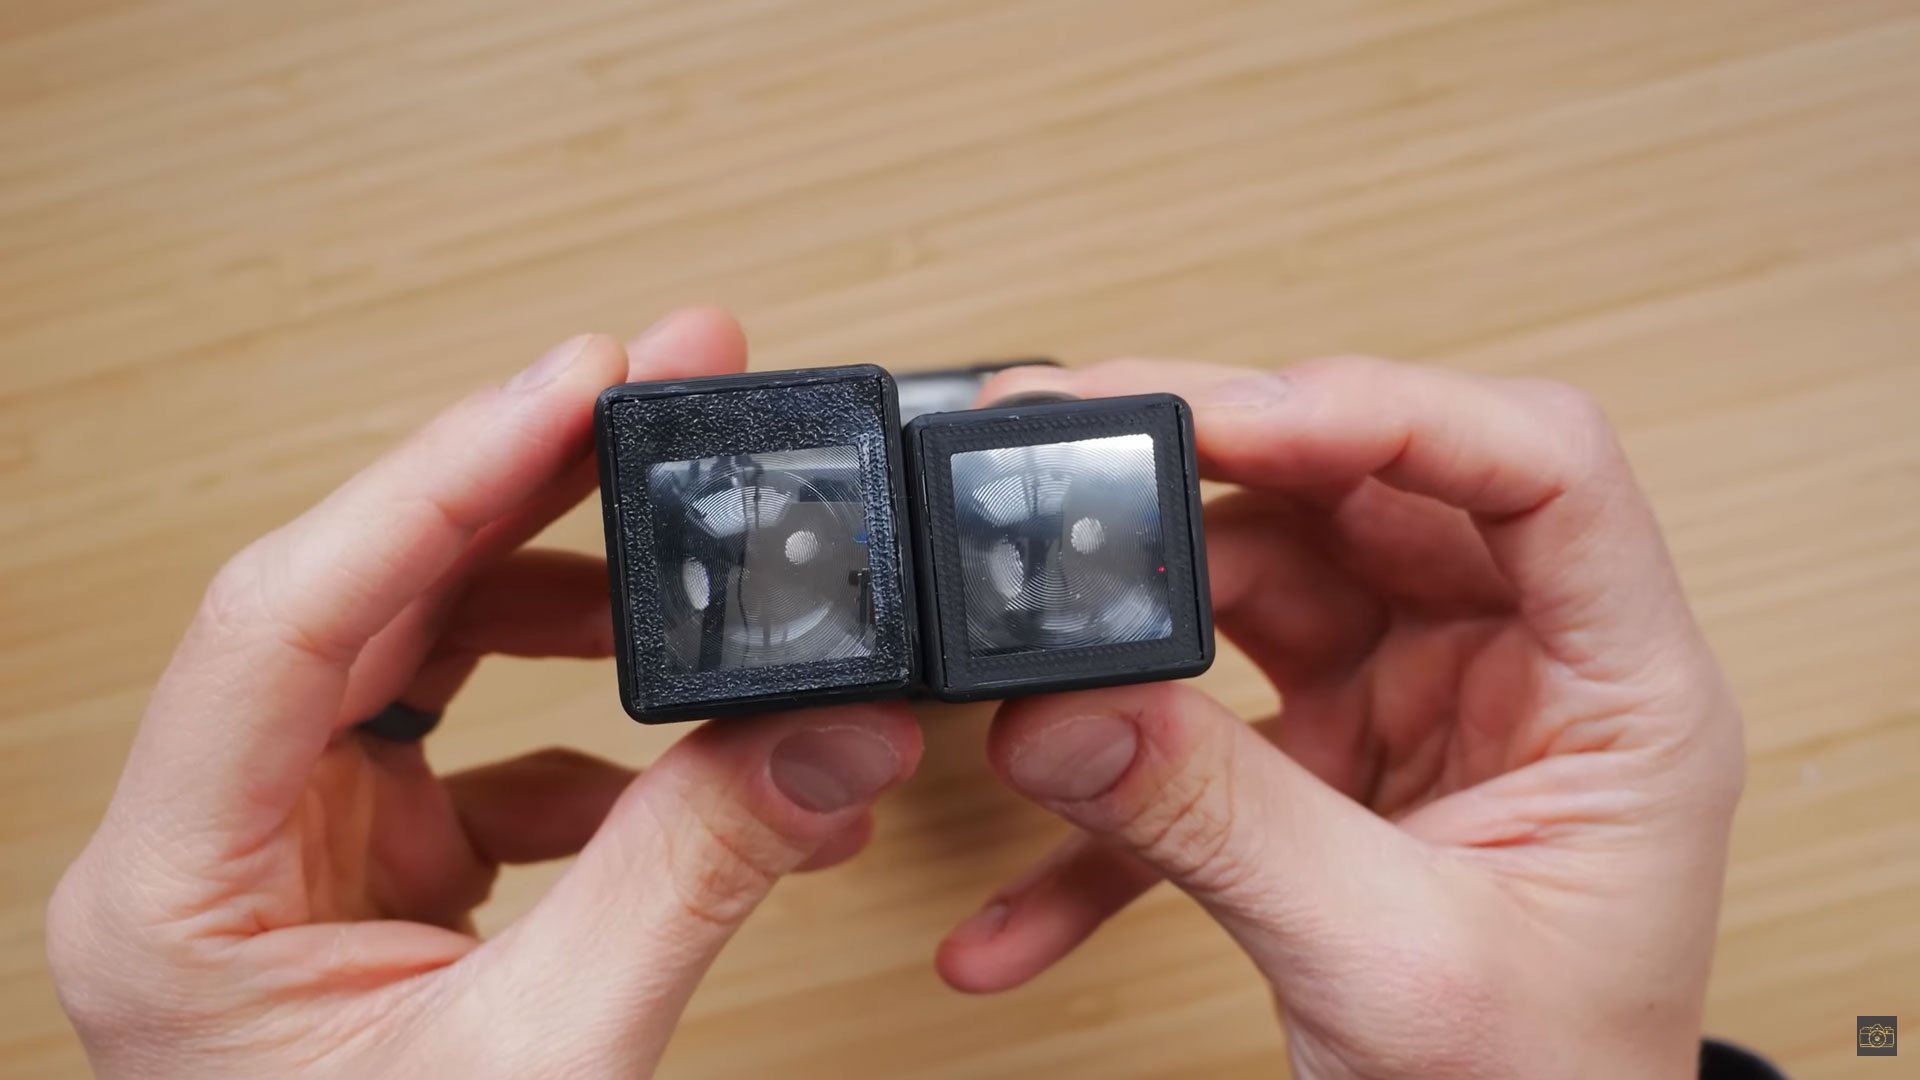
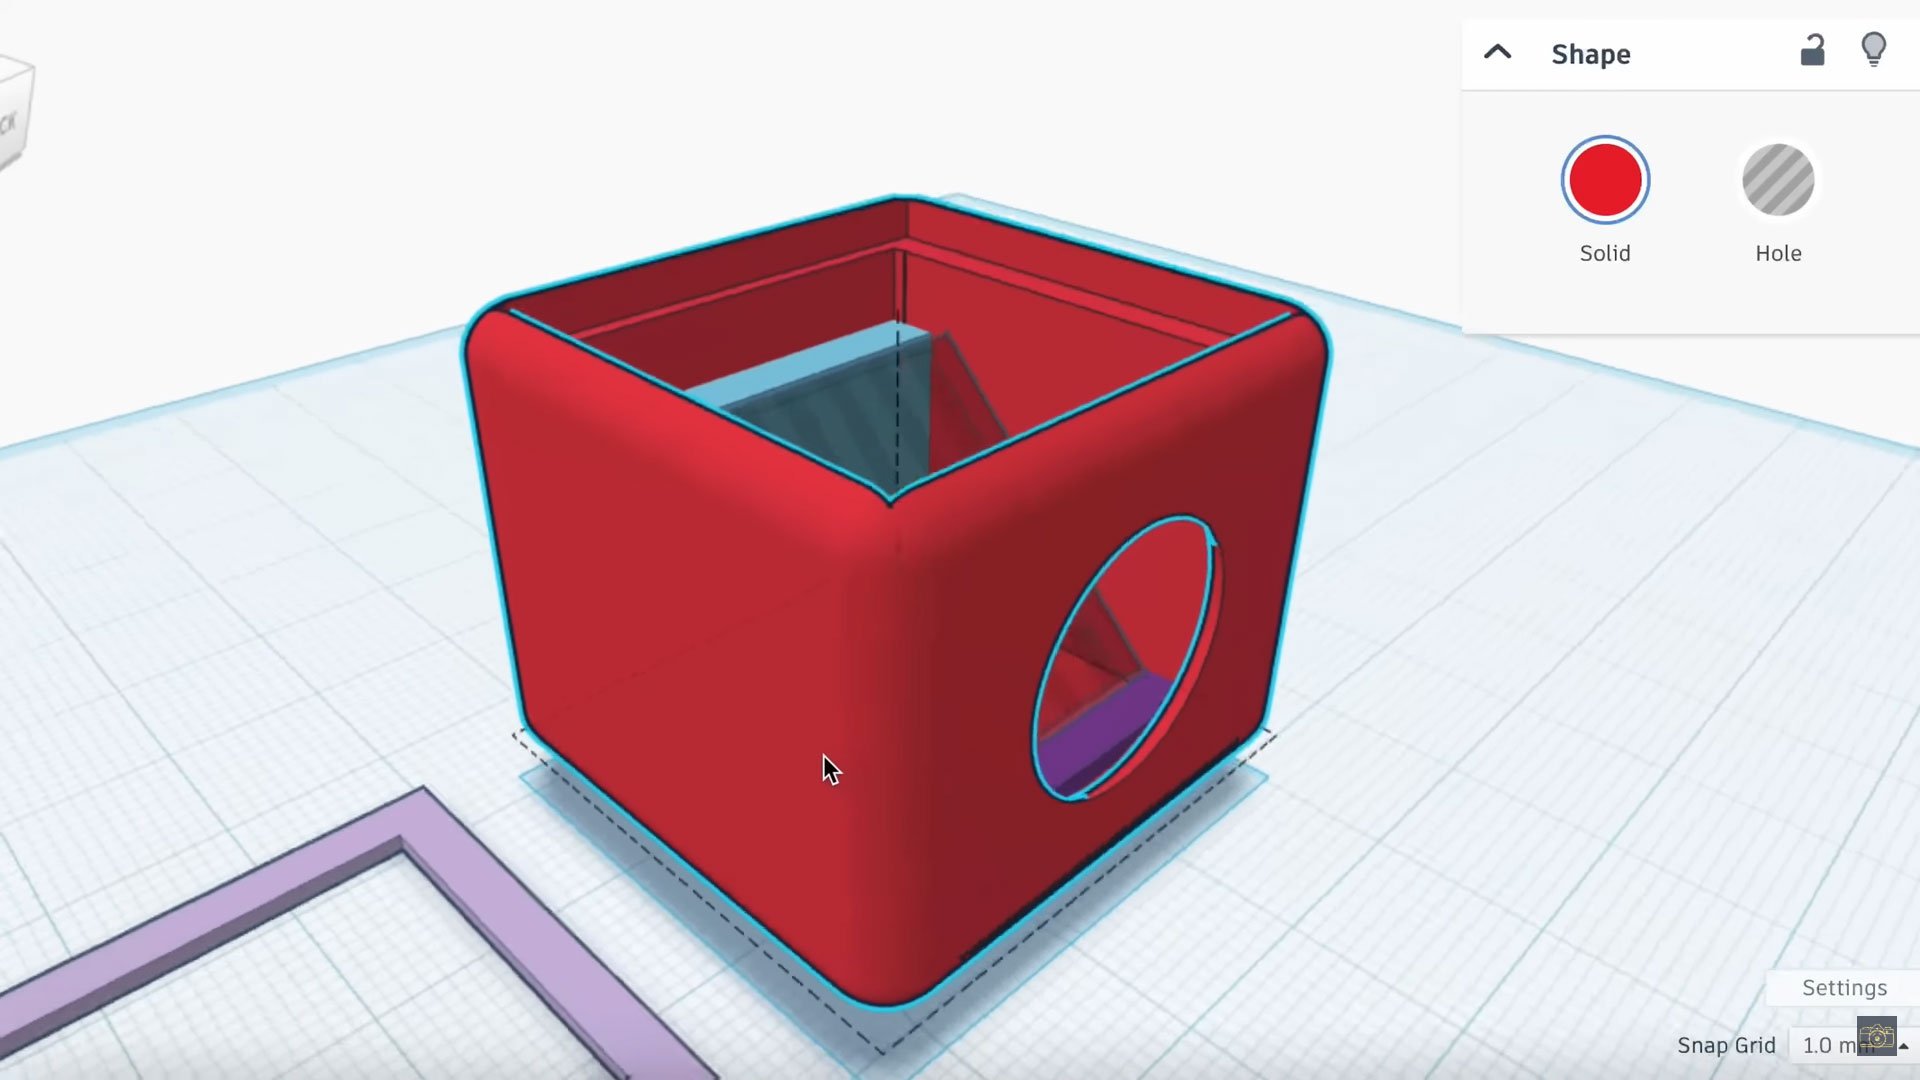
Making a waist-level finder of your own essentially involves combining a small circular convex lens, a mirror and a Fresnel lens (pronounced fruh-nel”). You’ll also need some kind of housing to hold these elements together and in place.
You could use just about anything for the housing. Snappiness uses simple cardboard for the initial prototype but then switches over to a cleaner, more polished 3D-printed housing. The files have been made available to download, but it’s fairly simple to design a simple box of your own with a couple of holes in it in Fusion 360 or other CAD software if you want to.
The focal length of the lens element you use is going to determine the field of view you see in the viewfinder. But they’re pretty cheap on sites like Amazon. Likewise, the mirrors are also inexpensive. For best results, you really want to try and find a first-surface mirror. But these inexpensive ones will do in a pinch. Small Fresnel lenses can be a little more difficult to find, but they are out there.
If you don’t have a 3D printer, I’d suggest grabbing some black foam core board. Even if you do have a 3D printer, a foam core version is a good place to start in order to test that it works as expected. You don’t want to create and print a design only to find out it’s not going to work with the way you thought.
Should you make one?
A waist-level finder isn’t something that many photographers will need. However, they can be invaluable in certain situations, as noted above. I’ve already mentioned some of those uses, such as street photography, but they can also work well for landscapes and, sometimes, even portraits.
With many modern cameras coming with tilting or flippy-out displays, some could argue they’re no longer needed. But for many uses, they’re still ideal.
I have to admit, I do miss the waist level viewfinders of my TLRs when I’m out and about with a DSLR or mirrorless camera. It’s a more relaxed way of working. I might have to add this one to my list of projects to make.

John Aldred
John Aldred is a photographer with over 25 years of experience in the portrait and commercial worlds. He is based in Scotland and has been an early adopter – and occasional beta tester – of almost every digital imaging technology in that time. As well as his creative visual work, John uses 3D printing, electronics and programming to create his own photography and filmmaking tools and consults for a number of brands across the industry.
Related Posts
 The Lux Is A Beautiful Waist Level 120 Camera, You Can Build It Too
 How to optimise your mirrorless camera tilt screen for waist level shooting with a piece of wood
 Spoil Your Point and Shoot By Making it A Waist Level Shooter
 This 3D printed motion control rig offers pro-level features at a DIY-level price
Join the Discussion
DIYP Comment Policy
Be nice, be on-topic, no personal information or flames.